4-Week Beginner Workout Program
Active Recovery
Active recovery is a type of exercise that is low-intensity and meant to follow a harder or heavy workout. Rather than remaining sedentary, active recovery is meant to get you moving, without over-training. Examples of active recovery activities include walking, hiking, and yoga.
Dynamic Mobility
This is a form of stretching, but you are not holding a specific posture. Instead, you are constantly moving. Examples of dynamic mobility include arm circles and shoulder rolls. Dynamic mobility should be completed before a workout instead of static stretching.
HIIT
High-Intensity Interval Training (HIIT) is a cardio workout that is designed to elevate your heart rate for a short period of time with bursts of exercise, followed by a short rest (hence the name interval training). HIIT is extremely intense, which is why it is only around 30 minutes. Traditional HIIT is typically formatted with 20 seconds of exercise, followed by 10 seconds or rest, or 45 seconds of exercise, followed by 15 seconds of rest.

LISS
Low-Intensity Steady State (LISS) is a low-intensity cardio workout. Because it is completed at such a low intensity, these exercise can be performed for 30-60 minutes or more. Examples of LISS activities include walking and light jogging.
Reps
Reps is short for repetitions. This is the number of times you will complete a specific exercise within 1 set. For example, 3×6 on push-ups means you will complete 3 sets of 6 pushups.
Rest (days)
Rest days are days where you will not complete a formal exercise routine. Instead, you should practice active recovery, meaning you are not completely sedentary, but you are also not training.
Rest Time
The time period you should between sets of an exercise.
Set
A group of a specific number of repetitions. For example, 3×8 on pulls-ups means you will complete 3 sets of 8 pullups.

Static Stretching
This is what you think of when you think of traditional stretching. You will be holding a specific stretch for an extended period of time. Static stretching should not be performed before an exercise, but rather after.
Warm Up
Before every workout, you should spend 5-10 minutes warming up. This means you are getting your body moving and blood flowing. This is a good time to practice dynamic mobility and/or foam rolling (myofascial release).
Examples of warm-up exercises are below:
- Jog in place
- Jumping jacks
- Arm circles
- Shoulder rolls
- Hip circles (invisible hula hoop)
- Knee circles
- Ankle circles
- Side to side twists
- Toe taps
- Kicks
- Bodyweight squats
- Bodyweight lunges
Don’t know where to start? Here is a Youtube video you can follow along with: workout warmup video.
Cool Down
After every workout you should practice a 5-10 minute cool-down routine. This will help you slowly and safely lower your heart rate. This is a good time to practice static stretching. Examples of cool-down exercises are below:
- Low runners lunge
- Sit and reach
- Toe touch
- Standing quad stretch
- Calf stretch
- Straddle stretch
- Overhead triceps stretch
- Spinal twist
- Splits
- Pigeon pose
- Butterfly pose
Don’t know where to start? Here is a Youtube video you can follow along with: workout cooldown video.
In this section, we’re going cover some of the exercises in this Beginner Workout Program in a little more detail so you know exactly what to do for each one. Some of the exercises in this program are well-known so we’ll skip those for now to save time for everyone. We’ll keep these quick and simple so you can stay on track, but it’s worth double-checking that you’re doing each exercise correctly and safely. The exercises will be listed in alphabetical order, so look up whatever exercise you’re interested in learning more about then get started!
Bicycle Crunches
Very similar to normal crunches, but with these, you’ll take your opposite elbow to your opposite knee (right elbow to the left knee and vice-versa). However, as you take your elbow to the opposite knee, straight that leg until it’s parallel to the floor, then return it to start as you lower your elbow back down. Alternate sides and keep the pace up as you get more comfortable with these – just like riding a bike!
Burpees
A traditional burpee is a 4-count movement. Stand in a standing position. Drop your hands down to the ground and kick your legs back. Drop all the way to the ground. Push your body up, like a push-up. Jump your feet inward to the standing position, stand tall, and jump, clapping your hands overhead. Return to the standing position and start the exercise again. Modifications:
- Easier: Make this exercise easier by slowing the movement and cutting out the jump.
- Harder: Make this exercise more difficult by holding a plank position or adding a push-up to the downward position. An additional knee tuck jump can be added at the end instead of a traditional jump and clap.
Butt Kickers
This exercise is very similar to a normal jog in place, except you are bringing your heels up to touch your glutes. This exercise helps build speed because in order to kick your butt, you will have to increase your tempo.
Dips (with chair)
For these, you’ll need a chair – a folding chair or dining chair will work fine. Start with the heel of your palm on the edge of the chair with your arms directly at your sides. Your legs will be in front of you and you can keep them straight or bent, whatever’s comfortable for you. Keeping as much weight as possible on your hands (keep weight on feet to make these easier), slowly lower yourself by bending your elbows. Go as far as you can and then return to start. As you get better at these you can place more weight on your hands and go lower! Modifications:
- Top Half Only – For these, only lower yourself about half the distance you would for a full rep. These will keep more of the effort on your triceps instead of your shoulders.
- Negatives – Same idea as push-up negatives, lower yourself as slow as possible and as deep as possible; you can use your legs to help push you back into starting position if you need.
- Segment – Same idea as Segment Push-ups here. Add 3, 1-2 second pauses during the lowering portion at ¼ of the way down, ½ of the way down, and at the bottom.
- With Pause – Just how it sounds, perform a normal dip but pause for 2-seconds at the bottom position before returning to start.
- Full Body– Follow the same procedure, but instead, use 2 chairs or barstools, lift your legs off the ground and use your entire body weight as resistance.
Running in Place (High Knees)
Just like it sounds, you’re running in place, but exaggerating getting your knees as high as possible. Perform prescribed reps on each leg and make sure to stand tall and keep your chest up the entire time!
Jumping Jack
Start in a standing position, with your arms rested by your side and feet about hip-width distance apart. Jump your legs out wider than hip-width and extend your arms out outward and overhead simultaneously. Jump back to the starting position.
Lunges
We’ll have some variations of these, but for normal lunges, you’re going to start standing tall with your feet about shoulder-width apart. Step forward with one leg and slowly sit into a lunge position. Keep your chest up at all times and try to keep your hands at your hips – you can use for arms for balance if need be. Sit as low as possible then return to start position. That’s one rep on one leg, so make sure to perform the prescribed reps on both legs.
- Lateral/ Side Lunges – Same idea with forward/reverse lunges, but with these you’re going to step out to the side instead of front/back. Squat as low as you can on that leg then return to start. Alternate legs for the prescribed reps.
- Lunge Jumps- These will be a frequent addition in cardio circuits as they’re quite challenging once you get the hang of them. You’ll start in a similar position to your body-weight lunge, with one foot forward and the other behind you. You don’t have to squat down very much on these, the goal is to simply jump high enough that you can switch your feet in the air and land with the opposite forward and the opposite foot behind you. As you get the hang of these, try to do these reps as fast as possible!
Mountain Climbers
For these, you’ll need some time of shorter surface, like a couch or living room table. Place your hands on the surface and walk your feet out until you have a straight line from heel to head. From this position, perform running steps in which you bring one knee to your chest then return it to the ground. Alternate feet each step until you get the prescribed reps on both feet. Make sure to keep your back flat, chest up, and belly button pulled to your spine the entire time!
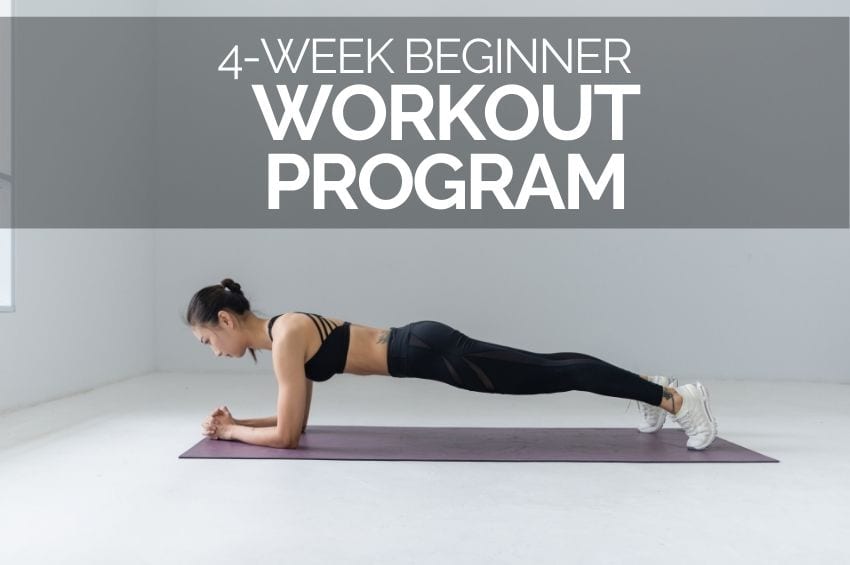
Plank
You can perform planks by holding a push-up position or by holding a similar position but resting on your forearms instead of your hands. As you hold this position, think about pulling your belly button to your spine and maintaining a flat line from your heels to your head. Don’t let your butt sag or rise as you get tired. If you notice you can’t make it the entire time with perfect form, stop and rest for 10-15 seconds, and then keep going until you get the prescribed time.
Push-Ups
Most people are familiar with push-ups but let’s go over them just in case. Start with your hands about shoulder-width apart or slightly wider. You can start on your knees to make push-ups a little easier, but the goal is to be able to be up on your toes for push-ups by the end of the program. Keep your belly button pulled towards your spine and a flat line from head to heel, just like in a plank. As you lower yourself down, try to keep your elbows tight to your sides. When you’re first starting, lower as far as possible and then return to start. As you get better at these you can start to go lower! Modifications:
- Elevated – Normal push-ups but with hands-on a chair/table rather than the floor. These will be easier so you can do more reps with a full range of motion!
- Offset – With these, you’ll do everything like a normal push-up, except you want your hands to be uneven. Move one hand a few inches forward and the other hand a few inches back. Perform half of the prescribed reps like this and then switch hands for the other half.
- Negatives – Same idea as a normal push-up, but lower yourself as slow and as deep as possible! You can reset to the top position however you want, you don’t have to do a full push-up.
- Segment – Just like a normal push-up, but you’ll add 3, 1-2 second pauses during the lowering portion. So lower a quarter of the way, pause, lower to halfway, pause, and then lower all of the way down with a pause before returning to start. These will be a big challenge but will improve your push-up strength big time.
- Shoulder Taps – Hold push-up position the entire time. Slowly tap your opposite shoulder with the opposite hand (left hand to right shoulder and vice-versa). Alternate sides until you get prescribed reps on both sides. Keep your torso square to the ground and try to avoid leaning side-to-side! You can widen your feet out to make these a little easier.
- Wall – Same idea as elevated push-ups but now you’re doing them against a wall. Walk your feet back farther for a greater challenge!
- With Pause – Just how it sounds, perform a push-up but pause at the bottom for 2-seconds before returning to start.
Pull-Up
Start by gripping the bar with hands shoulder-width apart. Lean slightly back, tighten your core (abs), and pull your chest to the bar. Keep your elbows tucked into your sides. Lower all the way back down. Modifications to make this exercise easier:
- Negatives – Jump up so that your chest is to the bar. Hold yourself at the top and slowly lower down.
- Resistance Bands– Loop a resistance and around the bar and step onto it. The resistance of the band will assist you in lifting yourself up.
Reverse Crunch
Here you’re going to start in a sit-up position, but your torso will stay on the ground this time. For these, you’re simply bringing your knees to your chest for each rep. For a greater challenge, start each rep with your legs straight! Modifications:
- Alternating – Same idea as the reverse crunch with legs straight here, but you’re going to bring one leg to your chest at a time rather than both. Alternate legs for prescribed reps. For a better challenge, try to keep your feet off the ground the entire time.
Russian Twist
With these, you’ll start in a sort-of half sit-up position where your feet are off the ground and you’re almost completely sitting up. Essentially you’ll be balancing on your butt! From here, rotate your torso so that you can touch the ground next to one hip with both hands, and then fully rotate to the opposite side so you can touch the ground next to your other hip with both hands. Repeat for prescribed reps on each side! To make these harder you can hold an object like a pillow or even a gallon of milk and work your way to heavier objects.
Squats
We’ll have a few variations of these in the program, but for these, you’ll start with your feet slightly wider than shoulder-width with your toes slightly pointed out. Push your butt back and sit back and down like you’re sitting into a chair. Keep your chest up and eyes forward the entire time. Go as low as you can for each rep – if you can’t go super low at first, that’s okay! You’ll get better. Modifications:
- Wide Stance – Same idea, just use a wider stance for these.
- With Pause – Same idea as a normal squat, but you’ll pause in the deepest position for 2- seconds before returning to the top. Make sure to keep your back flat and chest tall, even as you get tired!
- Shallow Squat– Same idea, just don’t squat as low.
- Split Squats– These are just like lunges but you’ll start in a lunge position rather than a standing tall position. You won’t alternate legs – you’ll perform all your reps on one side and then switch. These will be a little tougher to balance than lunges since you spend the whole time in the lunge position. As you get better, you can place your rear foot on a chair or couch so that you really have to balance on your front leg. Go as low as possible each rep and go lower as you go!
- Jump Squat- Just like your Body Weight Squats but now you’re jumping as high as possible every rep. Make sure to explode upward, but land softly.
V-Up
In a V-up, you’ll start by lying flat on your back with your legs straight, feet together, and arms straight overhead with your hands together. From here, perform a sit-up motion while also raising your legs and try to touch your hands to your feet – this position will make a big “V” shape, hence the name. If you can’t touch your feet at first, that’s fine! Just get as close as you can each rep, you’ll get better!

Congratulations on completing this 4-week beginner workout program!
Share your workout progress on social media and tag @ketogeniccom for a chance to be featured!

: How They Complement Each Other")